
Faucet aerators play a crucial role in controlling water flow, reducing water usage, and enhancing overall faucet performance. Over time, however, they can accumulate debris and mineral deposits, making it essential to remove and clean them regularly. If you’re wondering how to remove faucet aerators, this guide will provide you with all the necessary steps and tips for efficient removal, cleaning, and reinstallation. Understanding what a faucet aerator is, its benefits, and why regular maintenance is necessary ensures that your faucets remain functional and efficient for years to come.
Table of Contents
ToggleWhat is a Faucet Aerator?
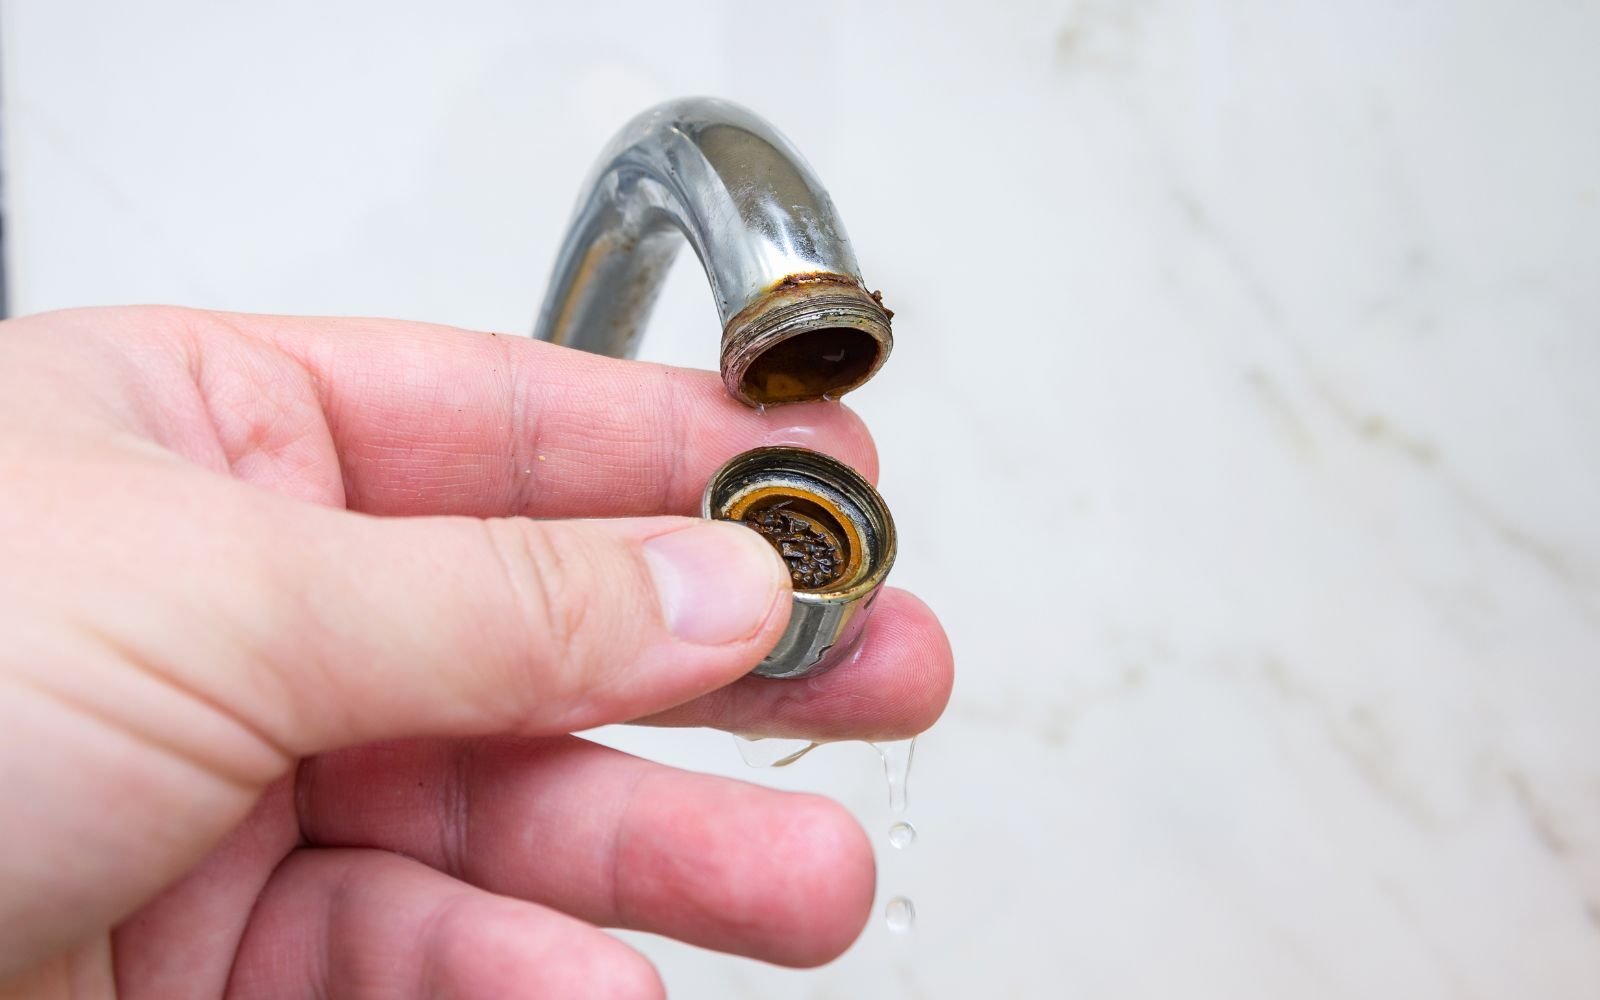
A faucet aerator is a small but essential device that screws onto the tip of a faucet, featuring a fine mesh screen that breaks the flow of water into multiple tiny streams while mixing it with air. This simple yet effective tool helps control the flow rate, reduce splashing, and conserve water, making it an important component in most modern faucets, particularly in kitchens and bathrooms. Faucet aerators come in various sizes and types, including standard, dual-thread, and specialty aerators designed for different applications. They are often made from durable materials like stainless steel, brass, or plastic to ensure long-lasting performance and resistance to corrosion.
Benefits of a Faucet Aerator
- Reduces Water Usage: By mixing air with water, an aerator significantly reduces the amount of water flowing through the faucet without compromising performance, leading to lower water bills and environmental benefits.
- Prevents Splashing: Aerators create a steady, even flow of water, minimizing splashing, which is especially useful in busy kitchens and bathrooms.
- Filters Out Debris And Sediments: The mesh screen in an aerator acts as a filter, trapping small debris, sediments, and particles from the water supply, ensuring cleaner water.
- Enhances Water Pressure While Conserving Water: Despite using less water, aerators maintain a strong, consistent water pressure, making tasks like washing hands, rinsing dishes, and filling pots more efficient.
- Easy To Install And Replace: Faucet aerators are user-friendly, requiring minimal tools and effort to install or replace, making them a convenient and affordable upgrade for any household.
- Promotes Sustainability: By conserving water, aerators contribute to water conservation efforts, supporting sustainable living practices and reducing the environmental impact of everyday water usage.
Whether you are looking to save on utility bills, reduce water waste, or improve the functionality of your faucets, installing a faucet aerator is a simple and cost-effective solution with numerous benefits.
Why Remove a Faucet Aerator?
Faucet aerators are essential for water efficiency, but there are several reasons why you might need to remove them periodically. Regular maintenance and occasional replacements help ensure that your faucets continue to function optimally. Here are some key reasons for removing a faucet aerator:
- Cleaning: Over time, mineral deposits from hard water, such as calcium and lime, can accumulate within the aerator’s mesh screen. These deposits can clog the aerator, leading to reduced water flow and uneven water distribution. Removing the aerator allows you to clean off these deposits, ensuring a smooth and steady water stream. Soaking the aerator in vinegar or a descaling solution helps dissolve mineral buildup, restoring its efficiency.
- Replacement: Aerators can wear out over time due to constant water flow, exposure to minerals, and general wear and tear. A damaged or old aerator may not function as efficiently, causing water wastage or irregular flow. Removing a worn-out aerator and replacing it with a new one helps maintain proper water flow, reduces water bills, and ensures the faucet operates as intended.
- Improving Water Flow: A clogged aerator can drastically reduce water pressure, making simple tasks like washing hands or rinsing dishes frustrating. Removing and cleaning the aerator restores the original water pressure and ensures efficient water usage. Regularly checking and cleaning the aerator helps avoid persistent low water pressure issues caused by blockages.
- Installing Attachments: Modern households often use additional attachments on their faucets, such as water filters, purifiers, or portable dishwashers. Many of these devices require the aerator to be removed before they can be installed. Removing the aerator allows you to securely attach these devices, enhancing your faucet’s functionality without compromising water flow or quality.
Removing a faucet aerator is a simple yet vital task that ensures your water system remains efficient, clean, and adaptable to your household needs. Regular checks and maintenance not only enhance water flow but also contribute to water conservation and system longevity.
Tools and Materials Needed
- Adjustable wrench or pliers
- Rubber band or cloth (to prevent scratches)
- White vinegar (for cleaning)
- Small brush or toothbrush
- Bowl or container (for soaking)
- Penetrating oil (if the aerator is stuck)
- Teflon tape (if needed for reinstallation)
- Aerator key (for cache aerators)
Additional Helpful Tools:
- Needle-nose pliers for small components.
- Soft cloth or microfiber towel for drying.
- Magnifying glass to inspect for damage.
Step-by-Step Guide to Removing a Faucet Aerator
Removing a faucet aerator might seem tricky, but it’s actually easy with the right steps. Whether you’re cleaning it or replacing it, this guide will help you do it quickly. Just follow these simple instructions to identify, remove, clean, and reinstall your aerator without any hassle.
1. Identify the Type of Aerator
Before starting, determine the type of aerator your faucet uses.
Standard Aerators: These are the most common and are easily visible as they screw directly onto the faucet tip.
Cache (Hidden) Aerators: These aerators are recessed within the faucet spout, giving the faucet a sleek, modern look. Removing them often requires a special aerator key or tool that fits inside the spout.
2. Protect the Faucet and Aerator
Before using any tools, wrap a rubber band, cloth, or masking tape around the aerator to prevent scratches and damage to the faucet’s finish. This step is crucial if you’re using metal tools like pliers or a wrench.
Pro Tip: A rubber band not only protects the surface but also provides additional grip, making it easier to unscrew a stubborn aerator without slipping or damaging the threads.
3. Unscrew the Aerator
For Standard Aerators: Start by trying to unscrew the aerator by hand. Turn it counterclockwise to loosen. If it’s too tight, gently use pliers or an adjustable wrench. Remember to keep the protective layer (rubber band or cloth) in place to avoid scratches.
For Cache Aerators: Use a specially designed aerator key. Insert the key into the faucet spout, align it with the aerator’s notches, and turn counterclockwise to release it.
Note: Be patient and gentle to avoid stripping the threads or damaging the aerator components. Applying too much force can cause permanent damage, leading to expensive repairs.
4. Remove and Disassemble the Aerator
Once removed, carefully disassemble the aerator into its individual components. These typically include:
- Housing: The outer casing that holds all components together.
- Mesh Screen: Filters debris and helps mix air with water.
- Flow Restrictor: Reduces water flow to conserve water.
- Washer: Ensures a watertight seal to prevent leaks.
Keep all parts organized in a small container or on a clean surface to avoid losing tiny components. Taking a photo before disassembly can help you remember the correct order for reassembly.
5. Clean the Aerator Components
Soak all aerator parts in a bowl of white vinegar for at least 30 minutes to dissolve mineral deposits and limescale buildup. For tougher deposits, you may need to soak them longer or repeat the process.
Use a small brush, such as an old toothbrush, to scrub away stubborn buildup. Pay close attention to the mesh screen and flow restrictor, as these are most prone to clogs.
Rinse each part thoroughly under running water to remove any remaining vinegar or debris.
For Heavy Buildup: Consider using a commercial lime-scale remover or a mixture of baking soda and water for extra cleaning power.
6. Reassemble and Reinstall the Aerator
Once all components are clean and dry, reassemble the aerator in the correct order: washer, flow restrictor, mesh screen, and housing. Double-check that each part is properly aligned.
Screw the aerator back onto the faucet by hand, turning clockwise until snug. If necessary, use a wrench, but avoid over tightening to prevent damaging the threads or the faucet.
Pro Tip: If you notice any leaks after reinstallation, apply Teflon tape to the faucet threads before screwing on the aerator. This helps create a watertight seal and prevents drips.
Removing, cleaning, and reinstalling a faucet aerator is a simple yet essential task that enhances water flow, reduces mineral buildup, and extends the lifespan of your faucet. Regular maintenance ensures efficient water usage and a steady, clean water supply.
Troubleshooting Common Issues
Even with careful handling, you might encounter some challenges when removing, cleaning, or reinstalling a faucet aerator. Here’s how to troubleshoot the most common problems:
- Stuck Aerator:
Sometimes, an aerator can become stuck due to prolonged use, mineral buildup, or corrosion.- Solution: Apply a penetrating oil or a lubricant like WD-40 around the aerator’s edges. Allow it to sit for at least 10-15 minutes to loosen the deposits or rust. Use a cloth or rubber band for grip and gently twist counterclockwise. If it remains stuck, try lightly tapping around the aerator with a rubber mallet to break the buildup before attempting removal again.
Tip: Avoid using excessive force as it might damage the faucet or aerator threads.
- Solution: Apply a penetrating oil or a lubricant like WD-40 around the aerator’s edges. Allow it to sit for at least 10-15 minutes to loosen the deposits or rust. Use a cloth or rubber band for grip and gently twist counterclockwise. If it remains stuck, try lightly tapping around the aerator with a rubber mallet to break the buildup before attempting removal again.
- Leaking Aerator:
After reinstalling the aerator, you may notice water leaking around the edges.- Solution: Check if the washer (a small rubber ring) is damaged, misaligned, or missing. Replace the washer if it’s worn out. Additionally, ensure all components are assembled correctly and tightly secured. If the leak persists, apply Teflon tape around the faucet’s threads before reinstalling the aerator for a better seal.
Pro Tip: Inspect the aerator’s housing for cracks, as any damage can also cause leaks.
- Solution: Check if the washer (a small rubber ring) is damaged, misaligned, or missing. Replace the washer if it’s worn out. Additionally, ensure all components are assembled correctly and tightly secured. If the leak persists, apply Teflon tape around the faucet’s threads before reinstalling the aerator for a better seal.
- Reduced Water Flow After Cleaning:
If you experience low water pressure even after cleaning the aerator, there might be an issue with the reassembly or the aerator itself.- Solution: Disassemble the aerator again to verify that all components are placed in the correct order. Check for any remaining debris or mineral buildup that may have been missed during cleaning. Inspect the mesh screen and flow restrictor for damage or blockages. Rinse each part thoroughly and reassemble carefully.
Tip: If the aerator is damaged, such as a torn mesh screen or cracked housing, replacing it is often more cost-effective than trying to repair it.
- Solution: Disassemble the aerator again to verify that all components are placed in the correct order. Check for any remaining debris or mineral buildup that may have been missed during cleaning. Inspect the mesh screen and flow restrictor for damage or blockages. Rinse each part thoroughly and reassemble carefully.
- Aerator Difficult to Reinstall:
If the aerator won’t screw back onto the faucet easily, the threads might be misaligned or dirty.- Solution: Clean the faucet threads with a brush and ensure they are free of debris or old tape. Align the aerator properly and hand-tighten it before using any tools. Avoid cross-threading by gently turning it backward first until you feel it seat correctly, then turn it clockwise to tighten.
- Persistent Problems:
If issues like leaks, low water pressure, or difficulty in removal persist despite multiple attempts, consider replacing the entire aerator.- Solution: Purchase a new aerator compatible with your faucet. New aerators are affordable and come with updated designs for better water efficiency and durability. Always choose the correct size and type for your faucet model.
Regular maintenance, proper cleaning, and correct assembly are key to avoiding these common aerator issues. With these troubleshooting steps, you can ensure that your faucet remains efficient and functional, providing steady water flow for everyday use.
Maintenance Tips
Regular maintenance of your faucet aerator is essential to ensure smooth water flow, prevent clogs, and extend the life of your faucet. Here are some detailed maintenance tips to keep your aerator in top condition:
- Clean Your Aerators Every 6 Months:
Mineral deposits, debris, and sediment can accumulate over time, especially in areas with hard water. It’s recommended to remove and clean your aerator every six months. Soak it in white vinegar for at least 30 minutes to dissolve any buildup, then scrub it with a toothbrush or small brush to ensure all components are clean. Regular cleaning prevents clogs and maintains consistent water pressure. - Use Water Softeners if You Have Hard Water:
Hard water contains high levels of calcium and magnesium, which can quickly lead to mineral buildup in your aerator. Installing a water softener system helps reduce these minerals, minimizing scale deposits in your aerator and other plumbing fixtures. If a whole-house water softener isn’t an option, consider using faucet-specific water filters or descaling solutions regularly. - Keep a Spare Aerator Handy for Quick Replacements:
Aerators are small, affordable components that can be easily misplaced or damaged. Keeping a spare aerator in your home ensures that you can quickly replace a faulty one without waiting for a trip to the hardware store. Having different types and sizes available is also helpful if you have multiple faucets with varying aerator designs. - Regularly Inspect for Wear and Tear:
Over time, aerators can wear out due to constant water flow, mineral deposits, and regular handling during cleaning. Regularly inspect the aerator’s mesh screen, flow restrictor, and washer for any signs of damage, such as cracks, tears, or corrosion. Early detection of wear and tear allows for timely replacements, preventing water flow issues and leaks. - Apply Teflon Tape When Reinstalling:
When reinstalling an aerator after cleaning, applying a layer of Teflon tape to the faucet threads can help ensure a tight, leak-free seal. This simple step can prevent annoying drips and enhance the overall performance of your faucet. - Avoid Over-Tightening During Installation:
While it’s important to secure the aerator tightly, over-tightening can damage the threads on both the aerator and faucet. Always start by hand-tightening and use tools only if necessary, with a protective layer like a cloth or rubber band to prevent scratches. - Schedule Regular Plumbing Maintenance:
Incorporate aerator checks into your overall plumbing maintenance routine. Along with cleaning aerators, periodically inspect other fixtures, pipes, and connections to ensure your home’s plumbing system remains efficient and free from potential issues. - Benefits of Regular Maintenance:
Routine maintenance not only ensures longevity and optimal performance of your aerators but also helps conserve water, reduce utility bills, and prevent unexpected plumbing problems. A well-maintained aerator contributes to a steady, splash-free water flow and enhances your overall water usage experience.
By following these maintenance tips, you can keep your faucet aerators in excellent condition, ensuring efficient water flow and minimizing the need for frequent replacements or repairs.
Frequently Asked Questions
Q: How often should I clean my faucet aerator?
A: At least every 6 months, or more frequently if you have hard water.
Q: Can I remove a faucet aerator without tools?
A: Yes, if it’s not too tight. Otherwise, use pliers or an adjustable wrench.
Q: What if my aerator is damaged during removal?
A: You can purchase a replacement from any hardware store or online.
Q: Are all aerators the same size?
A: No, they come in different sizes. Check your faucet specifications before buying a new one.